Monday, February 8, 2010

Pedestal Table Part IV

Pedestal Table Part IV
This is the fun stage where things start coming together and it begins to look like something.


I like to cut the dado's first, usually in several passes until I reach the desired depth.
Without changing the height of the blade I set the fence up for cutting the tongues.


Here again I make several passes until I reach the desired thickness of the tongue.


At this stage I like to dry fit everything together to check the fit.


Clamping this base together is a bit tricky. The blue clamps on the left are old Record clamps that have real deep jaws. There real nice and are some of my favorites, cant find them anymore.


So now we can see what its going to look like, pretty cool I think.


And here we are.......


Sunday, February 7, 2010

Pedest Table Part III

Pedestal Table Part III


This is the stage where we start assembling the arch and shaping the legs.


Once all the arch pieces are cut I like to lay them out, and then trace the pattern on the pieces. Then I can layout where the mortises will be cut without interfering with the layout.


The mortises were cut in the same manner as used with the legs, however here on the arch I varied the width to stay within the pattern.


The glue up for the arch is slightly different than with the legs. First since the arch will be a closed loop, I rough cut to the inside pattern lines before gluing. I glued the top three pieces in the same manner as the legs using the bench vice and clamps. Then I glued and pieced together the whole arch as shown at right.


With the glue applied then I just used clamps and equal pressure to get the arch square and let the glue cure.

Even with glue and tenons, I like to reinforce the joint with pegs.


Depending on the design and the wood, I'll either use a matching peg or a contrasting wood for the peg. To maintain a strong joint I do not drill and peg completely thru the material, just thru the loose tenon material.


The next step in the process is to rough cut the pieces. I like to do a quick sanding of the pieces then retrace the template outline in case some of the pieces have shifted during clamping and gluing.


I rough cut using the bandsaw, I'm not trying to be precise at this point, since I'll be using the router to clean up all the waste.


Using a top bearing flush trim bit and the template, its a very straight forward process to remove the waste.


Since all these parts are 1 3/4" thick, I make one pass with the top bearing bit and the template, then I can remove the template and make another pass just using the top bearing bit.


Then I can switch to a bottom bearing bit to finish removing the waste material. Top and bottom bearing bits are showed at left. On the right are all the finished parts.


The next step will be to cut the dado's in the hubs, and the tongues on the legs and the arch. Below I have one of the tablesaws set up to start cutting the dado's in the hubs. The shops starting to look a little crowded.


Thursday, February 4, 2010

Pedestal Table - Part II

Pedestal Table - Part II
Here we are concentrating on the two "hubs" that will be the atacching point for the legs and the "arch". Nothing complicated just a bit bulky because there 5" thick. I rip to a 5" width using the bandsaw then clean up the face on the jointer.


The same applies to cutting to length I rough cut to a 10" length using the bandsaw, then cleanup this cut using the tablesaw. When I laminated the hubs together I made sure that one end square and flush, so then I can use this end as a reference point in squaring up the cut on the tablesaw. Since its 5" thick I cut halfway then flip it over and cut the other side.


The two legs are splayed from the hub at a 30 deg angle in relation to the arch. Rip these on the bandsaw and clean up the cuts on the jointer. These need to be nice and flat since this is the attachment point for the legs. Later on I'll cut a 1" deep dado here for the legs.


The last two pictures illustrate my high tech angle gauge I use for setting up the saws and making the cuts.


Wednesday, February 3, 2010

Pedestal Dining Table

Pedestal Dining Table

One of the first projects for 2010 will be a pedestal dining table using walnut and maple. The table will be 40" wide by 72" long. The base will be made of walnut based on the one shown below.


I designed and built the above table in 2004 using cherry for the base and cocobolo for the top. It's a modification of and open pedestal that I have used for various tables, however in this instance I have "stretched" the base to accommodate a rectangular top.


In conjuction with this table I'll be making four chairs and four barstool all which require 8/4 walnut. So here's the starting pile.
For the two "hubs" on each end of the pedestal I'll use 12/4 walnut laminated together.


Gluing up the hub.


The four legs of the table require three piece each, that are tenoned together. The center part is cut at 45 degress on each end. I lay these three pieces out and trace the final shape from the template on them to determine where to situate the mortices.


Using a morticing machine (I have had that old router for 20 years now, first router I ever bought) cutting the mortices on all 12 parts is fairly quick.


All these parts will be joined using "loose" tenons. In this case I'm using 1/2" poplar.


Shown below is my fancy angle clamping jig, a vice and two clamps.

Next up is laying out the center "arch" and routing the mortices, plus final sizing and cutting of the "hub


Tuesday, December 15, 2009

2009 Year in Review

2009 was busy year at the shop with a total of 20 pieces being built, making a total of 133 pieces in 10 years, everything from a spiral staircase to jewelry boxes.

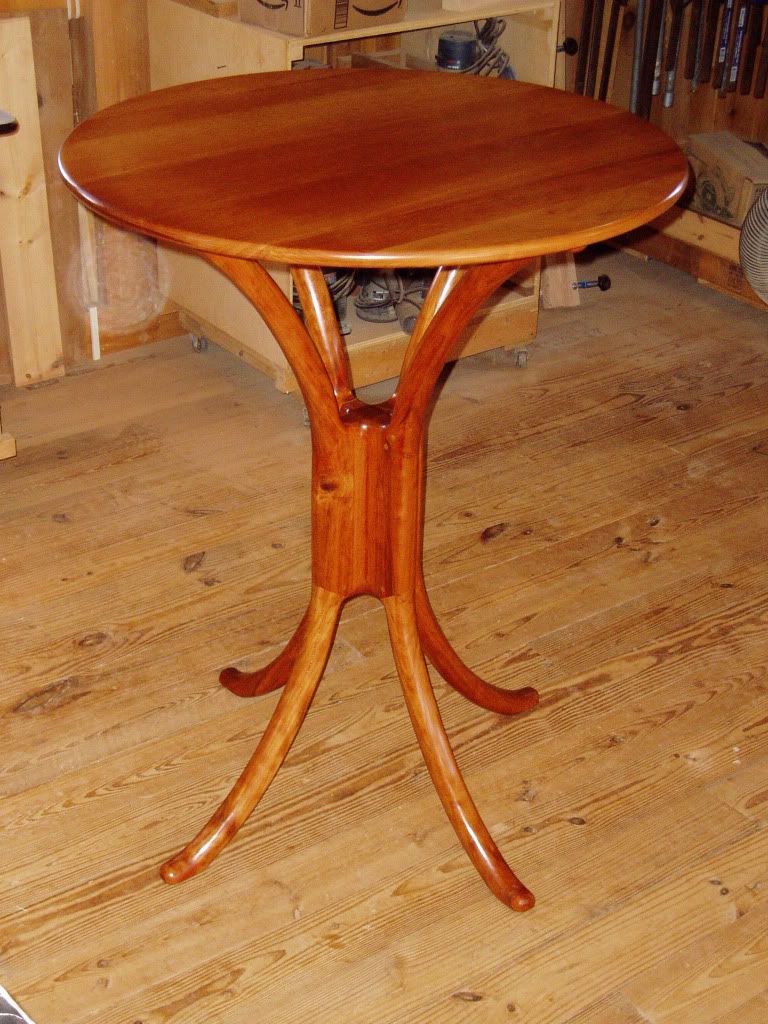
2009 started with a tall cherry "Bistro" table. The table is 36" in diameter and 40" in height. The design is based on early pedestal tables that I have built.


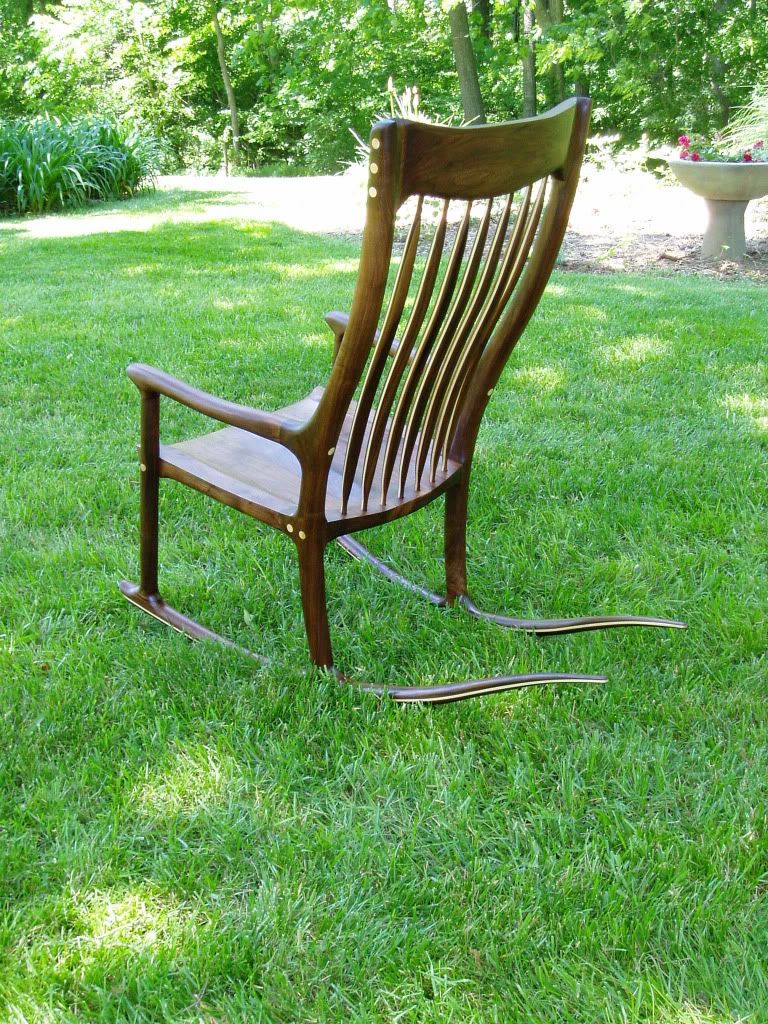
After the table, next came a walnut rocking chair, the second walnut rocker I've made, making for a total of nine


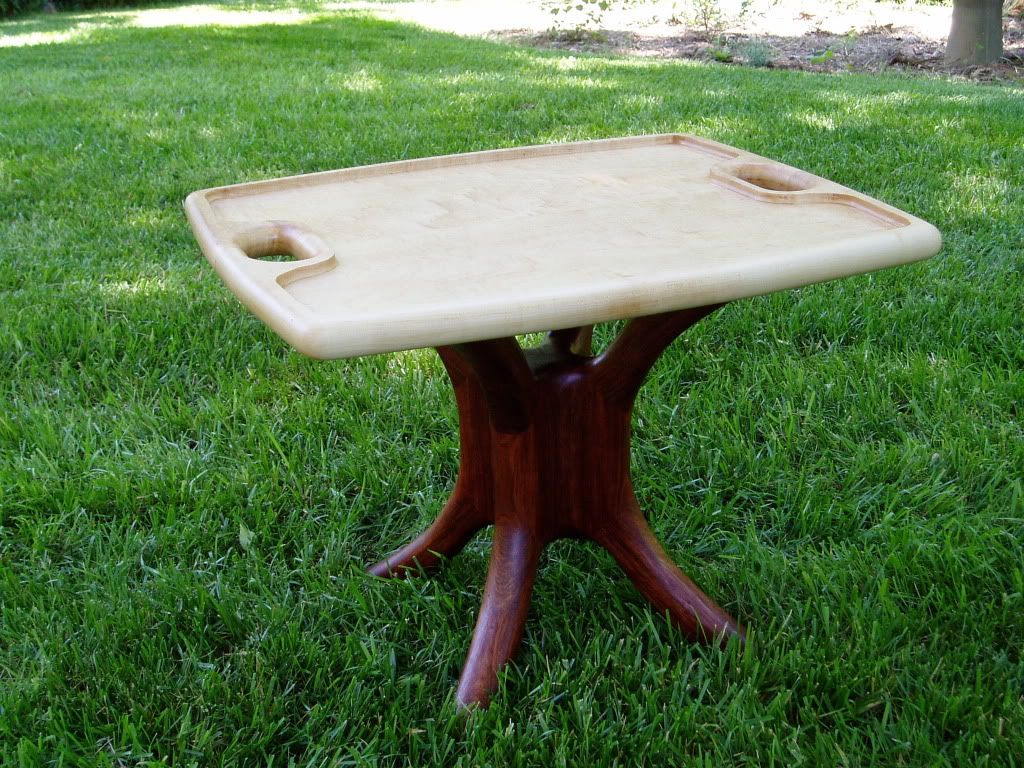
The third item was a "tray" table made of bubbinga and maple. This item was entered in the "Dual Personalities: Multifuctional Contemporary Furniture"at the Grovewood Gallery in Asheville, NC. The top of this table comes off and can be used as a serving tray. The table is still on display at the Grovewood Gallery.


About this time I lucked out and came into the possession of another table saw, and since I wanted keep my old one as well, I ended up building a cabinet to house both saws. Not quite furniture but definitly handy for cutting wood.


Also this year I branched out and made three different bathroom vanities, this particular one went into a master bath in the historic district of West End in Winston Salem, NC. I also made a matching mirror for this vanity.


I also made a series of seven tables made from cherry, maple, birch and walnut. Four of these tables went as a wedding present and the other three were entered into a juried exhibition in Knoxville, TN


Also entered in the exhibition were these two barstools. This was my first attempt at a juried exhibition and I had the good fortune of being accepted. This was only my third exhibition, including the one for the tray table at the Grovewood Gallery.


The exhibition was the 15th Tennessee Master Woodworkers Exhibition in Knoxville, TN. It was a great event and very nice exhibition space. This is my humble display.


This is a bed that I made for delivery early next year, was hoping to put the finish on this year but it looks like I'll finish it up after the holidays.


Finally the last three pieces for 2009 were these tables. The tall sofa table is for one cousin and the two end tables are for another cousin. The walnut for these tables came from the property where my cousins grew up.


Sunday, August 2, 2009

Catching up on updates

Since I haven't had a chance to post any updates since last November I thought I would do a quick review in reverse chronological order.

In May of 2009 I finished two projects one being a "tray table" more on that below, and the other being a walnut rocking chair shown below. I was very happy with this rocker the grain of the wood turned out to be just spectacular.


The other project was a "tray table" which I did for an exhibition at the Grovewood Gallery adjacent to the Grove Park Inn, The theme of the exhibition was "Dual Personalities" so each piece had to have more than one function. In my case its a table where the top is removable and becomes a serving tray. The base is made from Bubinga and the top is made from rock maple from the family farm in Michigan. Then following is a link to the exhibition: www.grovewood.com/dual_personalities.php?artists=bradford .


Prior to these two projects I made a Bistro Table for a client in early March. The tables is over 40" in height with a radius of 36". The table was made to be used with existing bar stools and to fit into there current kitchen. The table is made of solid cherry.


And finally late in 2008 I made a ladder for a client in Va to work with their recently built post and beam home. The ladder was made from cypress with cherry treads and it blended well with the materials used in the home construction.